
In today’s business environment, home and small offices are becoming more and more common. These are mostly set up by private individuals who want to engage in entrepreneurship and take advantage of the many opportunities in the market. In today’s ever changing world, every type of business, whether an enterprise giant or small home based business, must harness the power of Information Technology to be competitive and achieve their business’ full potential. IT technologies can make communication, processes, transactions, and many other aspects much easier and faster for your business. However, some IT technologies can be cost prohibitive for small businesses. Examples of this are hardware network or UTM (Unified Threat Management) solutions from vendors such as Cisco, Juniper, etc. which are essential to your business connectivity and security. If it’s not cost prohibitive, it can be difficult to implement for your average user. For example, free Linux distributions include a firewall and other security software as well as network server functionalities (file servers, web servers, etc.) but the CLI (Command Line Interface) nature of these solutions can drive an average user away. For small businesses, they need IT solutions that can fill their needs while remaining inexpensive, or even free, without the need for too much technical know how to do the job — ClarkConnect can do all of this and more.
ClarckConnect is a powerful yet very affordable, or even free, Internet gateway and network server solution for home or small office networks. With its simple web management interface, you will be at ease when deploying and configuring this solution for your network. Since it’s packaged in a bootable ISO/CD, all you have to do is boot it, follow the simple setup process, and continue the configuration through its web GUI — you don’t have to learn many Linux CLI commands to make this thing work.
The latest version available today is ClarkConnect version 4.3. It’s available in two packages: the Community edition and the Enterprise edition. The difference between the two is that the Community version is entirely free with some of its functionalities stripped while the Enterprise edition has a minimal yearly fee. The functionalities that are stripped, or limited, in the community edition are: 1 to 1 NAT ability, DMZ, Dual/Multi WAN functionality, and it is limited to 10 Mailboxes. If you don’t need these stripped or limited functionalities then the free Community edition is right for you. However, functionalities such as 1 to 1 NAT ability and DMZ can be useful if you have more than one public IP address or for added security so you might consider the Enterprise Edition. For only $85 a year for its license fee, including free Level 1 technical support, the Enterprise edition also has a five year span of software update maintenance available — the Community edition only offers two years. If you consider the functionalities, that’s very reasonable when compared to other network or gateway solutions out there. As for its features, below is the list that you would expect to find in a package like ClarkConnect:
Firewall, Networking and Security – this includes intrusion detection and prevention, DMZ, 1-to-1 NAT, port forwarding and peer-to-peer detection, Multi WAN (for Enterprise) and Bandwidth monitoring and management.
VPN / Virtual Private Networks – includes PPTP, IPSEC site to site VPN, and now included in version 4.3 is the more secured OpenVPN.
Web Proxy and Filtering – this includes web proxy, content filter for control of web usage, and a Banner and Pop-up blocker.
E-mail – this includes integrated POP and IMAP server (dovecot), SMTP server (postfix), Webmail (horde), integration with Outlook and Thunderbird, AntiSpam (spamassasin, greylist and dspam), and Antivirus (clamav).
Groupware – this includes groupware packages (kolab) for collaboration and Flexshare for easy file sharing within your organization.
Database and Web Server – this includes the LAMP service (Linux Apache MySQL PHP) for your database and web server needs.
File and Print Services – this includes Samba for Windows files sharing, FTP server (proftpd), print server (cups) and network LAN backup using Bacula.
To use ClarkConnect, you must meet these hardware requirements:
Processor – can support up to four processors – Pentium, Celeron or AMD. 1 GHz is recommended for 5 – 10 users, 2 GHz for 20 – 50 users, and 3 GHz for 50 – 100 users.
Memory – at least 512 MB in memory. 1 GB for 5 – 10 users, 1.5 GB for 20 – 50 users, and 2 GB for 50 – 100 users.
Disk Space – at least 1 GB of disk space. For Critical environments, RAID configuration is recommended.
Deploying ClarkConnect Enterprise
Once you meet the hardware requirements for ClarkConnect, then you’re all set to deploy this great solution. In this case, I will use the enterprise edition with a trial license so all functionalities will be present. You can download the latest version of ClarkConnect at http://www.clarkconnect.com/downloads and choose between community or enterprise editions — both in bootable ISO format which you need to burn on a CD. To get the 30 day trial license, go to this link, https://secure.clarkconnect.com/webapp/evaluation.jsp, create an account and request a 30 day trial license. The license code will be emailed to you. Simply enter the trial license code into your account profile to activate the trial license. Once you have downloaded and activated the trial license, you can now proceed with the installation.
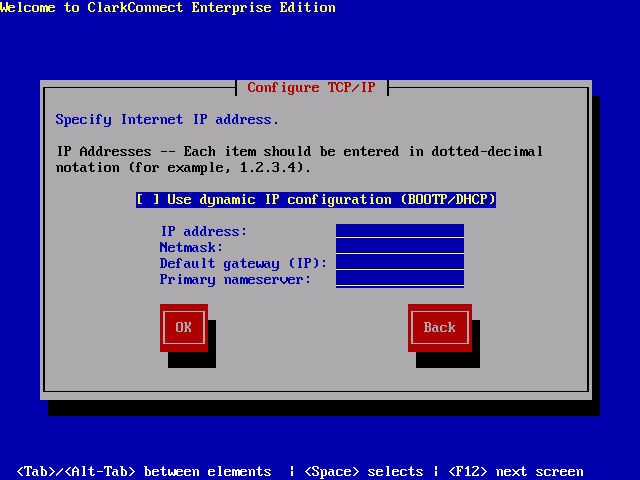
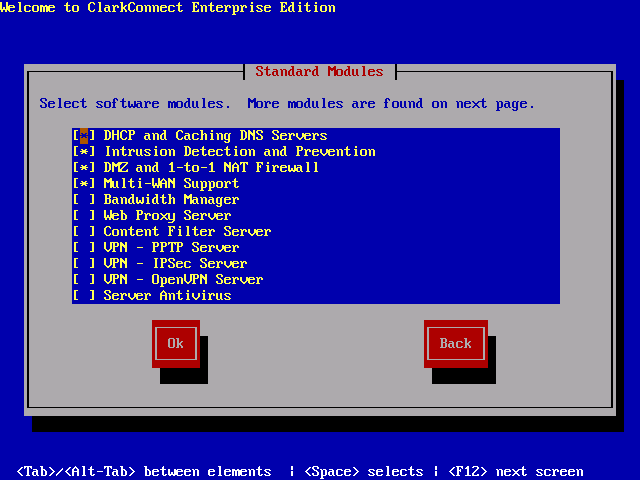
Boot the ClarkConnect ISO or CD and you will be welcomed to a familiar Linux boot prompt. Type “linux” to continue the boot process. The next installation steps are very straight forward. You will be asked first for some settings such as keyboard layout and time zone. After that, you must choose the installation type: “install” if it’s a fresh installation and “upgrade” if you have an existing older version of ClarkConnect. Then you have to choose if the server configuration will be a gateway or a standalone server. Choose gateway if your ClarkConnect server will be your firewall and network server. You must have at least two NICs (Network Interface Cards) for this configuration to work — One for the external interface going to the Internet and the other network card for the internal LAN (Local Area Network). Choose standalone if you already have an existing firewall and you only need the server functionalities of ClarkConnect. After that, you will configure some network settings such as the type of external interface connection (Ethernet, PPPoE, DSL, etc.), public and private address, hostname/domain name of the server. You must also set the system password and configure the partition for the server. You can let ClackConnect handle the disk partitioning or create your own. Once that is configured, you must select the functionalities that will be installed on the ClarkConnect server. To minimize resource usage on the server, choose only what you need. After you select the functionalities you need, simply wait for the installation process to finish and reboot the system.


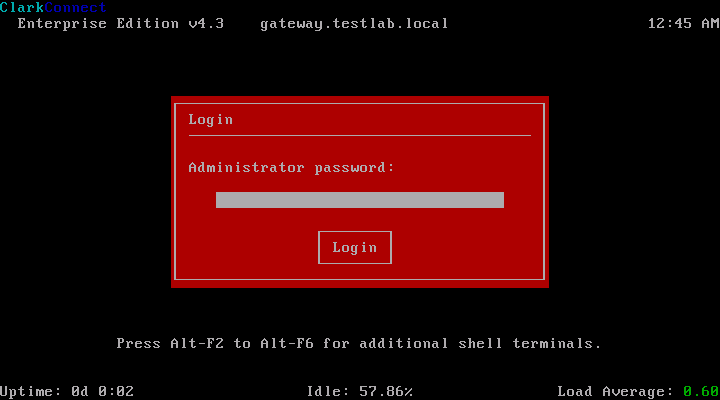
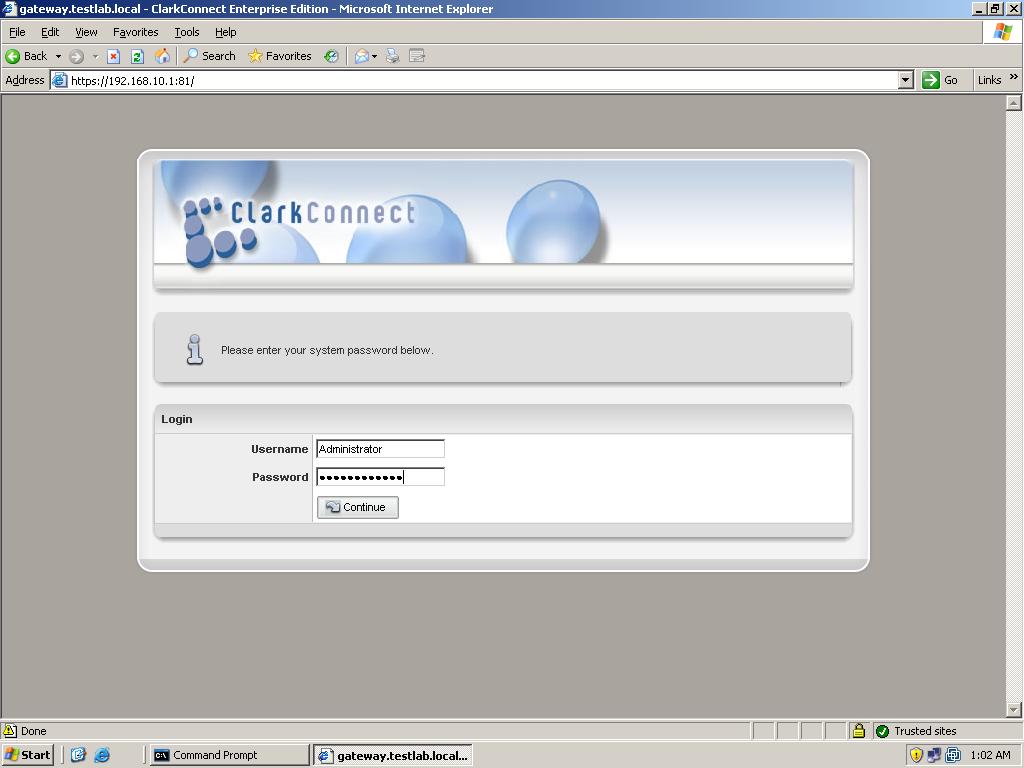
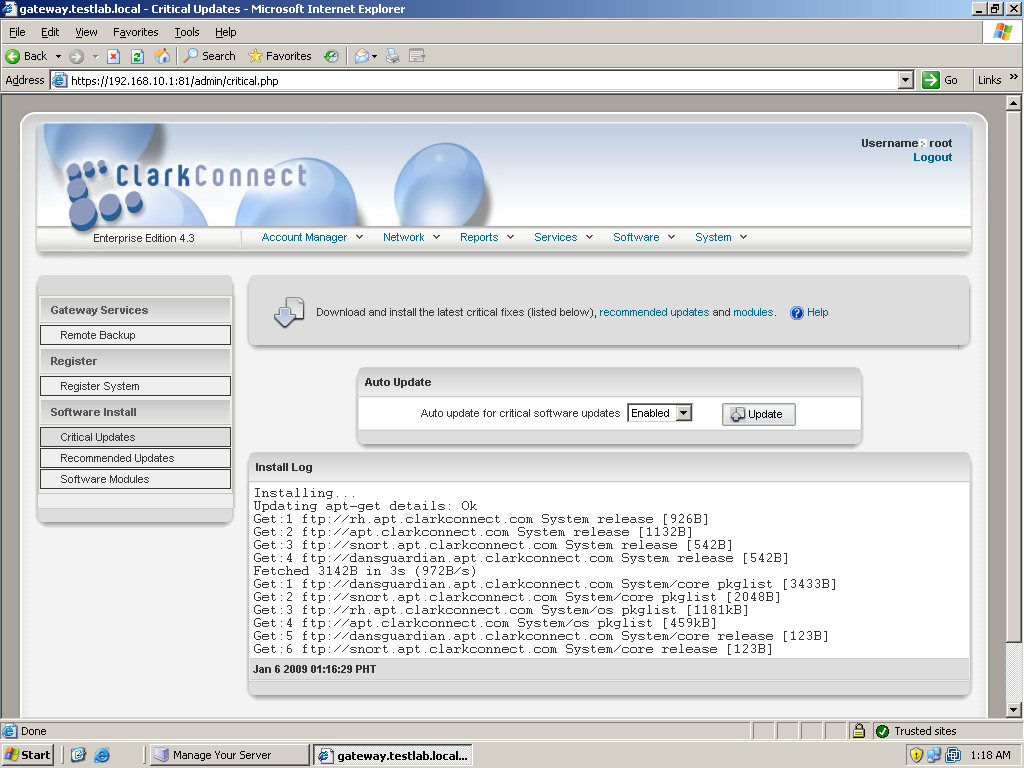
On the system’s first boot, you must register and update the server. To do that, just log in to ClarkConnect’s web management interface by entering this address into your browser: (https://IP address or hosname:81). The default username that you will use is “root” and the password is the system password you set during the installation. You will then enter the management interface. In the top menu of the management interface, click on Services, to show its submenu, then click on “Register System” to start the registration wizard. In the software registration box click on the option to add a new system to your account. You will be then asked for your account username and password that you created when you requested your trial license earlier. Just follow the steps which are very straightforward. Once you finish the registration process, it would be a good idea to update the system. To update the system, click on Services again and choose Critical or Recommended updates. Of course it would be a good idea to do the critical updates first. It will display the modules installed and their respective current versions. Just select the modules you wish to update and click Go to proceed. Wait for the update to finish. The process is the same on Recommended Updates. Once the system is updated, you can now proceed with the configuration of ClarkConnect’s functionalities.


Network and Services Configuration
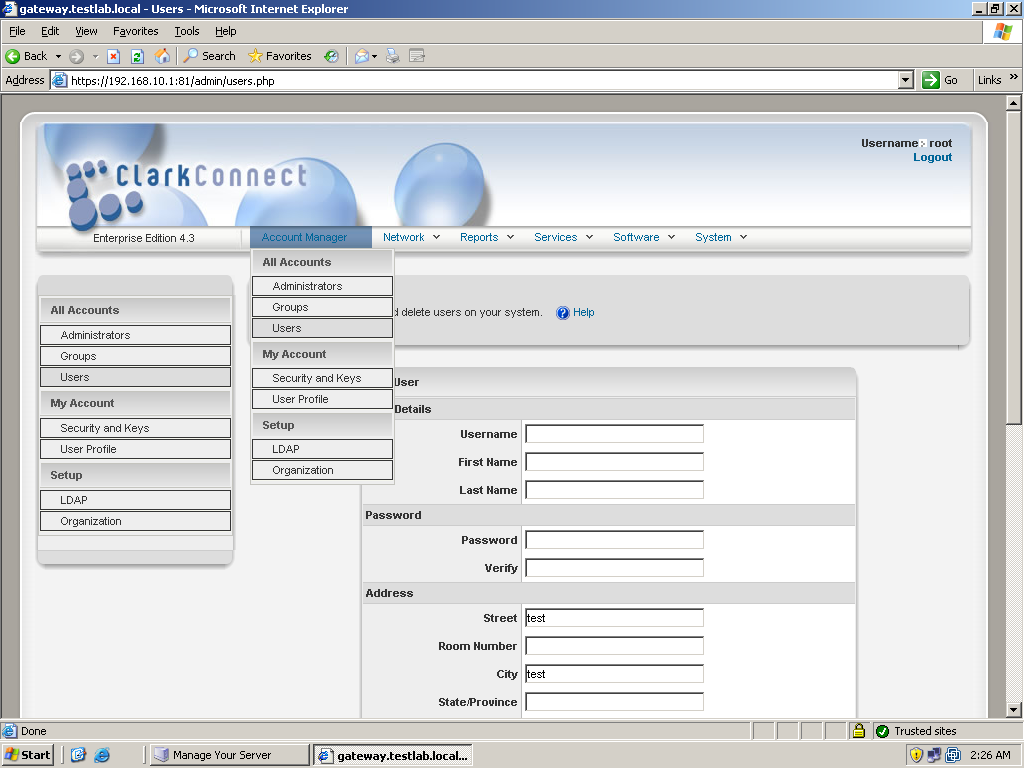
ClarkConnect has many features and it would be impossible to thoroughly discuss each one in this article. So we’ll focus more on the basic functionalities that are necessary in a home or small office. The first things to configure are the Network settings which include firewalls, NAT, port forwarding, etc. But, before that, it is a good idea to create first users or groups which will be later used when you create network policies and rules. To do that, go to Account Manager in the top menu and click on Users. This will display user information and status. You will want to click on the option to create a new user. Just fill in the necessary details such as username and password, full name, address, etc. You must also select the services that will be enabled for that user. This includes a Mailbox service, OpenVPN, PPTP, Proxy Server, File Server, FTP, and Web. Then, click Add to create the user.
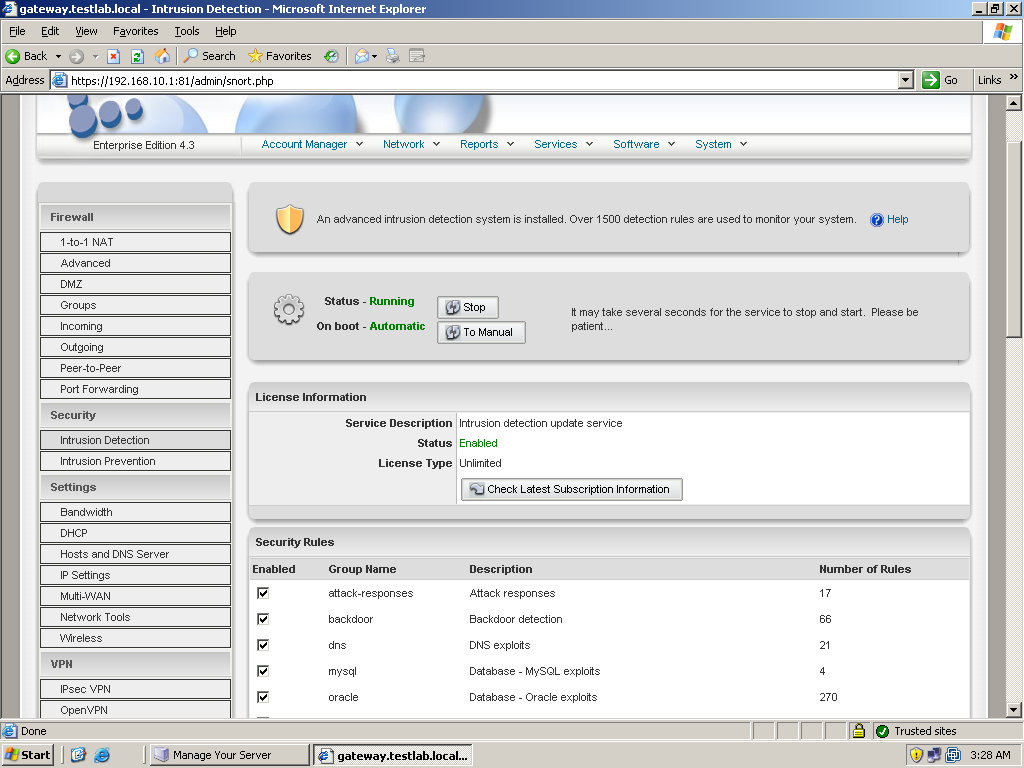
Next, let’s configure the network and security settings. In case you need to change the IP or Hostname settings you set up during installation, just go to IP settings or Hostname and DNS settings under the Network menu. There are many options under the network menu. Let’s configure first the firewall. There are several ways to create firewall rules in ClarkConnect. Under the Network menu, you can choose either Advanced, Incoming, or Outgoing. Advanced will let you configure customized rules. Select this first if the action would be to block incoming, accept incoming, block outgoing or port forwarding. After you select an action, just enter the IP address to block or deny, followed by the ports and protocol then click Add when you’re finished. You can also create a rule using Incoming. It is almost the same as Advanced with the difference being the rules based on Incoming allow traffic entering your network. There’s also a selection of predefined services that you can choose such as HTTP, FTP, etc. As for Outgoing, it’s the same as Incoming but it will block traffic going outside. Just like Incoming, you can select the services to block. Other options in networking include Port Forwarding that basically forwards traffic to a specific port of an internal server. You can use this if you only have one available public IP. Just create the firewall rules that will suit your needs and remember that firewall rules follow a top to bottom approach – meaning that once a rule at the top is satisfied, it will not test the other rules below it. Other network security features include intrusion detection and prevention. There is not much to configure here except to select the possible security threats that you want to detect and to make sure that the intrusion prevention database, based on Snort, is updated.

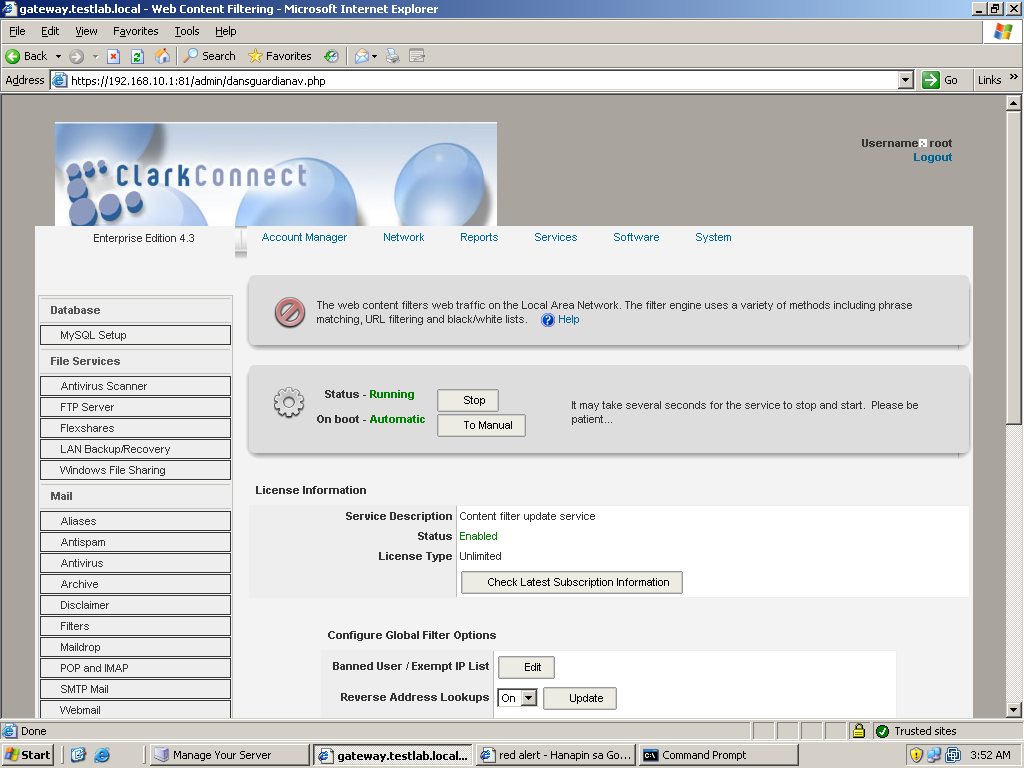
Now let’s proceed to some services such as Web proxy’s content filtering and File server functionalities. ClarkConnect’s web proxy capability is based on the popular Squid proxy. While you can enable the web proxy to operate in transparent mode, which does not require any additional settings on your browser to work, this does not support HTTPS traffic and user authentication but does support Content filtering. To configure your web proxy, just go to Software on the top menu and choose Web Proxy. You simply need to select the settings to enable such as transparent mode, content filtering, Ad and Banner blocking and User authentication. Remember that you can’t enable both transparent mode and user authentication. If you will enable content filtering, you must first enable its service. On the Software menu, click on Content Filter to enter its configuration interface. If the service is stopped, click on the Start button. Some settings that you can configure on content filtering are Virus Scanning, URL analysis, Site list, Phrase list, Blacklist, Extension/MIME, etc. Just select the necessary options you wish to enable.
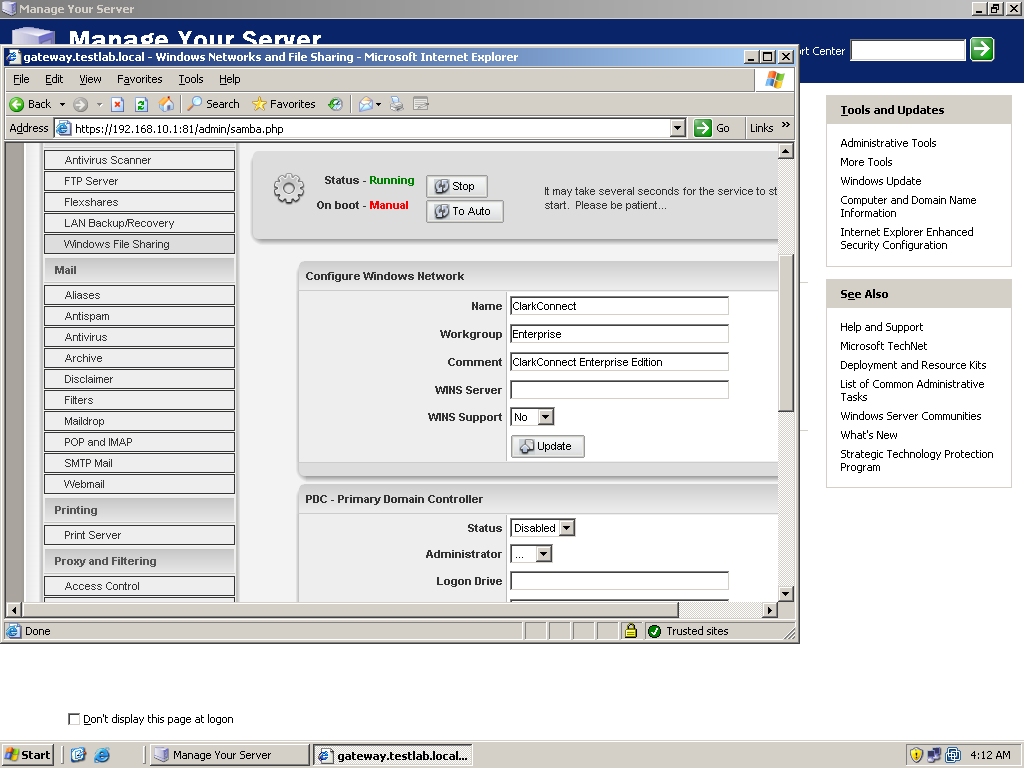
Next, is to configure a simple file server using ClarkConnect. The main file server system service of ClarkConnect is based on Samba so both Linux and Windows environments can take advantage of it. Go again to the Software menu and look for Windows File Sharing. Click on it to bring up its configuration page. By default, Windows File sharing is disabled so click on Start to enable it. Once running, configure its settings. The configuration is so basic that you will only need to provide a name, workgroup, and description of the network share. You must also enable what folders to share. By default, the home directories of each user are enabled. To create custom folders, you must use ClarkConnect’s Flexshare module. But for now, let’s stick with home directories. Once configuration is finished, just click on Update. With that, you now have a working Windows Network file server based on Samba.
Testing
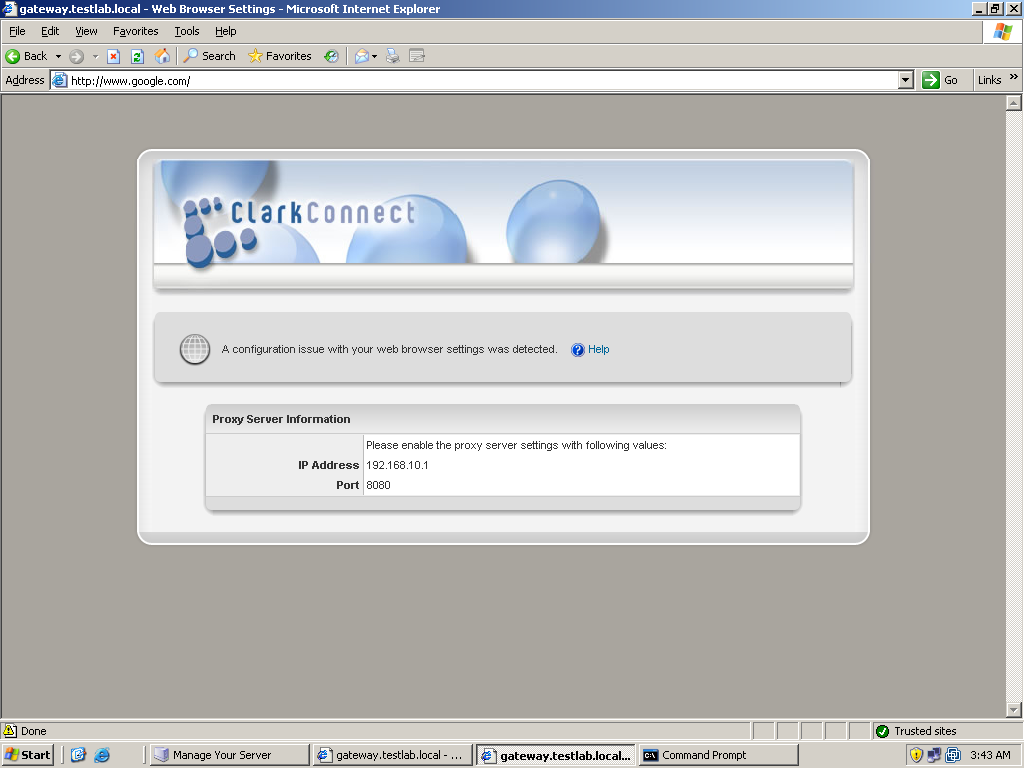
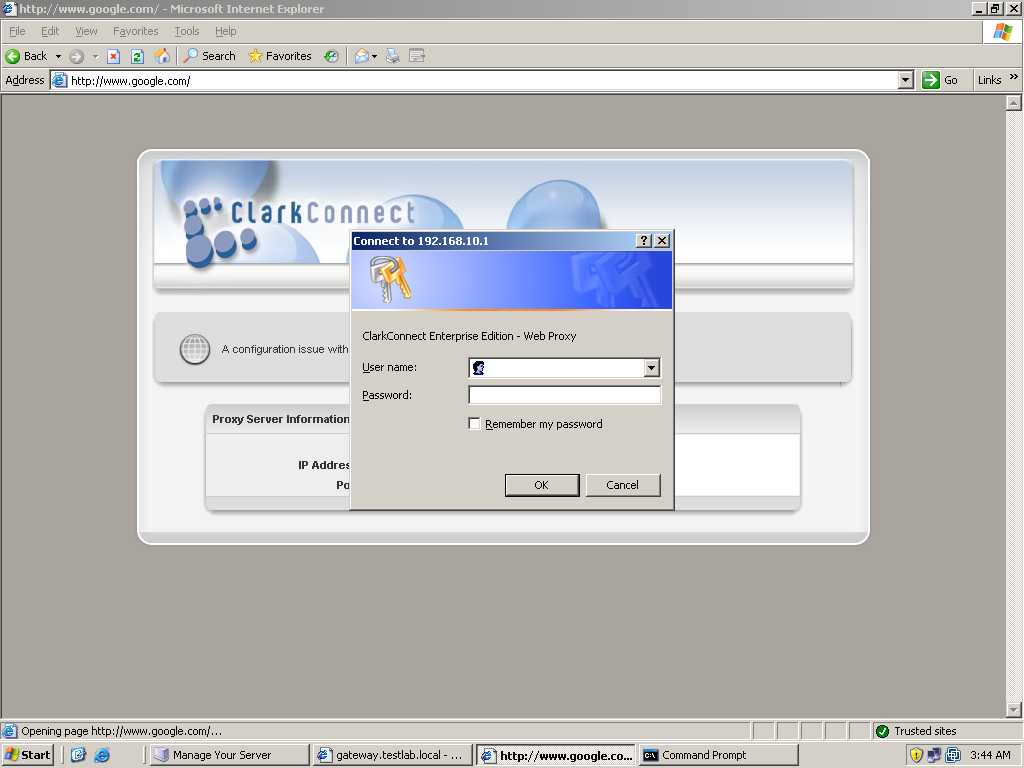
Let’s test the configuration we’ve done. Let’s start first with the web proxy. Since we want user authentication, transparent was not used. The downside is that you need to configure the browser’s proxy settings. Try first by browsing without configuring the proxy settings of the server. You will be directed to a ClarkConnect page telling you to enter the settings indicated on the page into your browser’s proxy settings. If you enable content filtering, the port to be used by the proxy is 8080. If there’s no content filtering, the port would 3128. Once you enter the proxy settings, try browsing again. If it’s the first time you open the browser to browser, a login dialog box should appear for proxy credentials. Use the user account you’ve created for ClarkConnect. After entering the proxy credentials, you can now successfully browse. Now try testing the content filtering capability of ClarkConnect. You will observe that when you access sites that are forbidden, like pornographic sites, the Web page won’t load. This means that the content filtering is working.
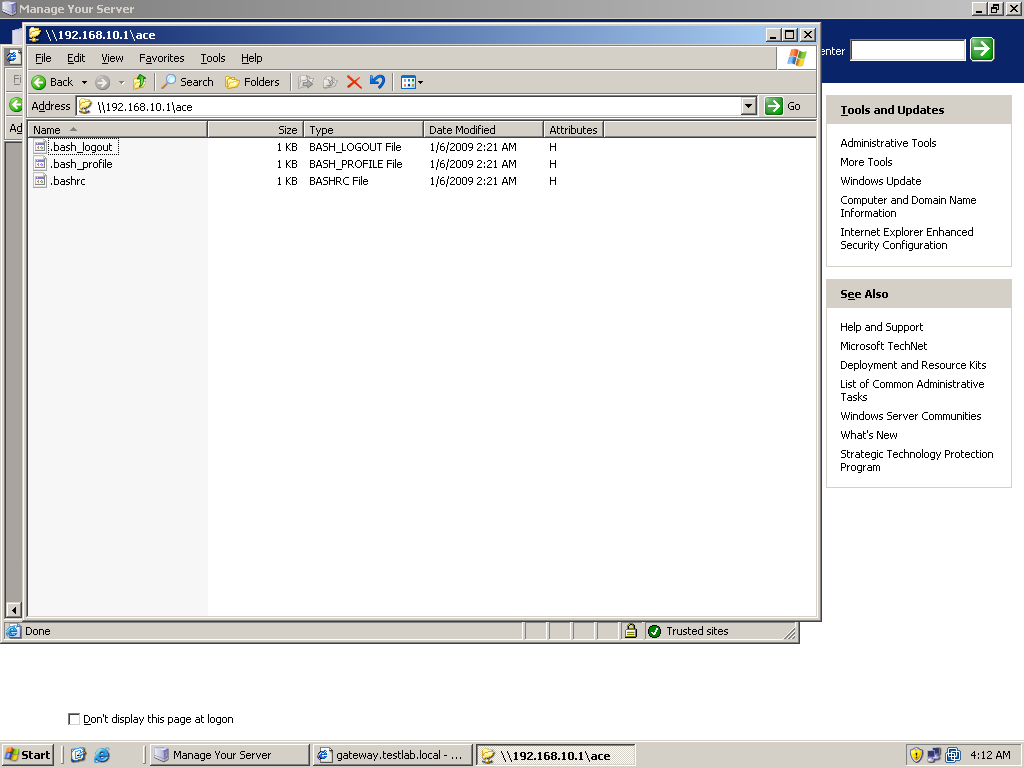
Now, let’s test the ClarkConnect Windows File Server we configured. Open the Run dialog box in Windows and enter the address: \\IP address or hostname of the server\. It will ask again for logon credentials — just enter the username and password you have created in ClarkConnect. Depending on the user account you enter, the home directory for that user should be accessible.

Conclusion
Although there was time enough to discuss only a few features in this article, there are still many features that ClarkConnect has to offer. If possible the next series of articles about ClarkConnect will discuss other features such as VPN, Backup, Groupware solution, and Mail Service. As shown in this article, configuration of ClarkConnect is very simple and nearly, if not completely, free. For home and small office systems, ClarkConnect can be the answer to your IT networking needs.
* This piece was created as speculative work (on spec) or the rights to this piece have reverted back to the original author and is for sale. Learn more.